We moved into our first home, a 1950s ranch, in July 2008. We bought the house because it had what we needed and it fit our budget. We did not buy the house because we liked anything about the way it looked. The grass was thigh-high, the bushes overgrown, and everything inside was dated thirty years, dirty, and tired looking. Also, I was vacuuming up long, black hair for at least a month. Gross.
Fixing it up has been an adventure, and now that we’ve done work in every room, I’m going to show off our handy work. We’re happy with what we’ve done so far! Most everything is still a work in progress (and probably will be until we move out), so we’ll just call it kinda sorta done for now. Three cheers for “Before and After/Now” photos:
*** More Photos Coming Soon ***
Curb Appeal
The Living Room/Dining Room
The first room you walk in to a house should looks its best, don’t you think? Our living room needed some help. While it certainly wasn’t the worst room, the dirty cream colored Berber carpet and dingy cream walls weren’t doing anything for it. One wall was paneled with a blond faux wood, and the wall beneath the large picture window was…well, I’m not sure what to call it. But it had to go. Take a look:
Basically, it was a cardboard-esque wallpapered board that took the place of drywall, so when we ripped it out, the wood framing was exposed. We simply drywalled, mudded, and painted for a cleaner and simpler look.
Here is another shot of the room as it looked when we moved in.
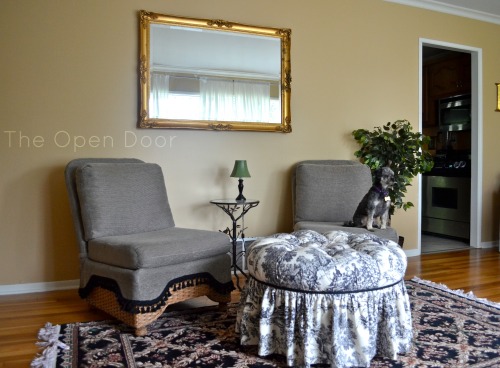
After we painted the walls (including the paneling) Valspar Warm Buff, we ripped up the carpet and had the original white oak wood floors refinished. We are so pleased with how they turned out.

The other side of the room, with the front door and coat closet on the left. (The hanging plant is Phyllis, who we killed a few months after moving in.)
To complete the room, we painted the trim and front door (Valspar Honey Milk), added crown molding, and added new curtains. We decided to use this room as a living/dining room combo since we already have a family room in the back.
Now:
More coming soon!
_______________________________________________________
The Kitchen
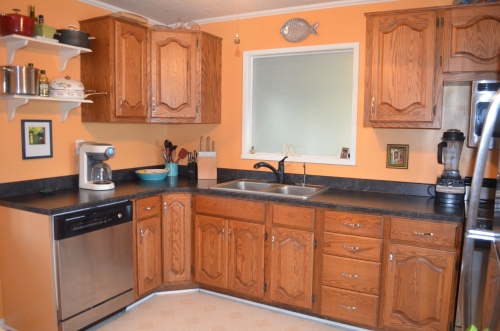
Oh, the kitchen. Frankly, I’m surprised we we’re scared away from this house after walking through this room. Fixing it up was a beast, but we managed to do it ourselves with the help of my dad and grandpa. We were on a very tight budget, and since the cabinets and floor were in good shape, they stayed. Everything else – the wood and plastic paneling covering the walls, the counter tops, the sink, and the appliances – was replaced. We extended the counter to add a dishwasher, added some open shelving, put in crown molding and new baseboards, repaired and painted the horribly damaged walls beneath the paneling, raised the height of the cabinets, and replaced the hardware. Phew! I’m tired just thinking about it.
Before:
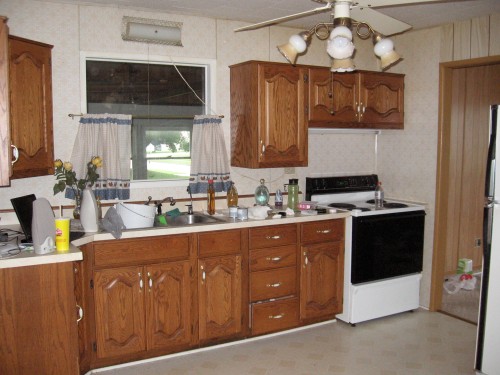
A view from the back corner of the kitchen. The basement door is just to the right, and the entry to the family room on the left. Notice the gorgeous view of the garage through the window! (But at least we have a garage!)

The grey wood paneled back wall with our paint choices. This is where our kitchen table sits now. (This angle makes the wall look tiny – it’s not.)
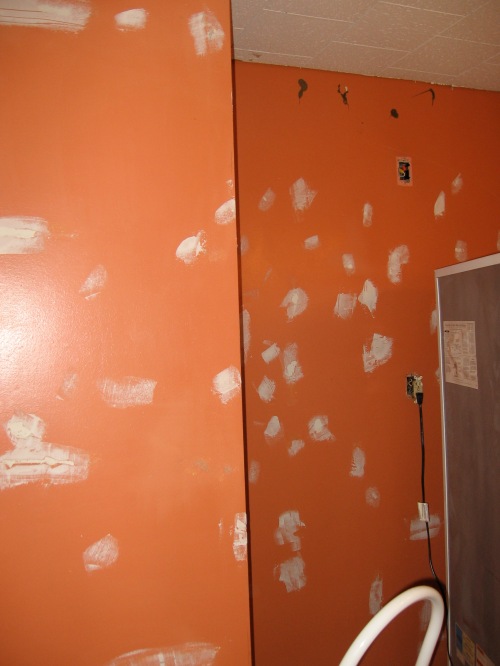
After we pulled off all the paneling and took down the cabinets, this is what we found:
We had a lot of holes and glue damage to patch…
Now:

Our window situation: It looks out into the garage. Such a lovely view. Since we didn’t want to lose the little bit of natural light from the garage’s window, we covered the glass with frosted window film. Much cheaper than replacing the glass!

Help! What do I put on this sad empty wall? (Also, the wall color here is NOT peach. It’s a slightly orange YELLOW. Dang computer screens.)
_______________________________________________________
The Family Room
Aside from the kitchen, this room is where we spend most of our time. It’s also the room we left untouched for the longest period of time. We decided to paint the paneling three years after moving in, and once we did that, we couldn’t stop ourselves and made a bunch of other changes to the room as well, including painting the trim, adding built-in shelving, replacing the carpet with laminate flooring, buying new furniture, changing up the art, and putting up new curtains. You can read more about the family room updates here and here. We love how much brighter and happier the room feels.
Before:
Now:
More coming soon!
_______________________________________________________
The Hallway
The hall was painted the same off-white color as the living room and had the same tired and dirty off-white Berber carpet. Since it’s right off the living room, the color is the same on the walls and trim. Throw in some new six-paneled doors, crown molding, and a rug from Target, and we called it a day! Phew, that was easy.

The bathroom door is on the left, Charlotte’s room is straight ahead, the master is the second door on the right, and the third bedroom is the first on the left.
___________________________________________________________
The (one and only) Bathroom
Before:
We’ll just call this our Plastic-tiled Wonderland. But not wonder as in wonderful. No, this would be wonder as in I wonder what the hell these people were thinking when they decorated this bathroom. Unfortunately, this is our only picture, and it makes the room look better than it was. The plastic-tiled walls, while brown and ugly, actually ranked pretty low on our Blech list. The sub floor around the toilet was wet and rotting due to an ignored leaky toilet, and the linoleum floor was discolored dirty grey in all the traffic areas while the corners were a yellowed cream and blue.
It’s hard to tell in this picture because the vanity hung low, but the sink was only a little over 2.5 feet tall. This was short enough to make me feel like a normal-sized person and for Chris to feel like an eight year-old. Worst of all, open the lower cabinet under the sink basin and you’d be greeted with beautiful splatters of black mold.
The shower is in the far right front part of the photo, across from the linen closet door on the left. It wasn’t too bad aside from a thick layer of soap scum and the (full head of) black hair clogging the drain.
The inside of the bathroom door was wallpapered with a border that matched the shower curtain, and there was orange mold on the ceiling….
However, the linen closet looked okay! Phew.
After saying all this, you’d probably think we’d tackle this room first, but it happen that way. We did scrub the heck out of every surface, replace the toilet seat and fix the leak, and bleach the heck out of the mold right when we moved in, but then we started other projects (like the kitchen…), and then we got kinda burnt out and lazy, and before we knew it two plus years had passed. Finally, November 2010, I was nine months pregnant and decided this bathroom needed to be done before The Baby arrived. So my sweet and handy dad drove out for a couple of days and taught Chris how to re-do a bathroom. And I was happy. (The End)
And now, finally, the Nows:

The same view with new: sub-floor and linoleum, sink, vanity, light fixture, curtains, paint on the walls, trim, and doors, six paneled door, shower curtain, and rug!
_________________________________________________________
Bedroom 1
Oops! No Before pictures.
This room was painted an off-white color in satin finish. There was cream carpet and orangey-brown stained trim (like the rest of the house.) One closet door has an unsightly lump where a patch was applied that the previous owners covered up with a Christmas bow…We tried to sand it down, but it’s covering a screw. Oh well, we live with it. We refinished the floors, painted the trim and closet doors white (Honey Milk by Valspar), painted the walls a calming grey-blue, and replaced the hollow door with a six-paneled duracore door. Much better!
Now:
 (Oh. Yes, our pillows leave something to be desired.)
 *You will notice all the bedrooms have wall fixtures rather than light fixtures. This is both strange and annoying. It was quite challenging to find something that was affordable and did not look like it belongs in a bathroom. I’m not sure that we achieved the latter, but hiring an electrician to re-wire for new overhead lighting is not an option, so they stay.
 (Can you see the lump on the door? Maybe this isn’t something I should be pointing out. But I just had to tell you about that Christmas bow!)
__________________________________________________________
Bedroom 2
Again, this bedroom didn’t look great, but it also wasn’t terrible. We just needed to remove the border, slap on lots of sticky primer to cover up the high gloss ballet slipper pink paint that covered the walls, closet door, and windows/door trim, and choose a new paint color. We ended up choosing “Gleeful” by Valspar, which is a chipper yellow-green (but more green than yellow). It was the perfect color for our cheery guest bedroom, and it transitioned perfectly to Charlotte’s nursery. (No re-painting! Yay!) This detail may or may not have been planned for when we chose the color back in ’08. 🙂
Before:
Now: Coming Soon!
____________________________________________________________
Bedroom 3
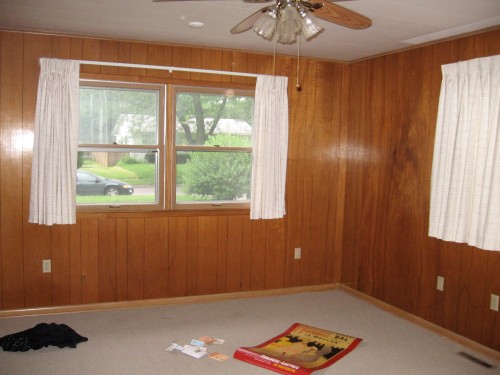
Our third and final bedroom was also painted in high gloss light pink with a slightly different yet still outdated floral border. This is an interesting bedroom because it has two doorways – one leading into the hallway near the other bedrooms and bathroom (shown), and the other would be close to where the camera is positioned in the opposite corner, which is off the kitchen. (The window is also back there.) The previous owners used this room as an office, and we did too until a few months ago when we got rid of our old “guest room:” the big, comfy sectional in the family room. We like the flow the second door adds to the house since it creates a nice circle connecting the living room, kitchen, and hallway, but if we were going to stay here long-term and use this room as a real bedroom, we’d probably close up the doorway to make it more bedroom-y and less hallway-y. The color is the same as the living/dining room and hallway: Warm Buff by Valspar.
Before:
Now:
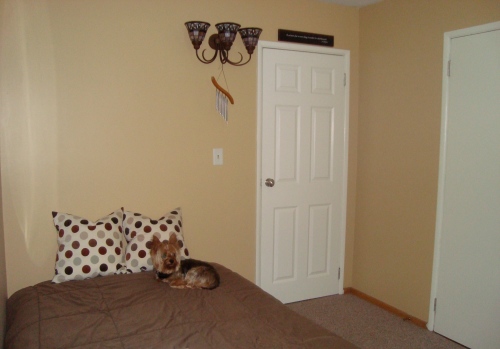
Same view – new paint, new door, painted trim (except the baseboards)and closet door, new light fixture, futon with Ikea pillows
It looks like we could use a few more things up on the walls. We’ll get there some day. 🙂

View of the window with painted stripe curtains (Read about those here!)








This is awesome! I can’t wait to see more. I have been meaning to take pictures of when we finally moved into our house… but boy does time pass when you have a baby! 🙂
Be so proud! You’ll always remember this first home with fond memories. What a transformation!
Thanks! It will be hard to move when the time comes!
What a cozy house, Katy!!! I can’t wait to see it one day!!
Thanks, Aunt Susan! I’ll put up current pictures soon. We’d love to have you out for a visit some time. Maybe you can take a little road trip with my mom when you are in GE. 🙂
Holy paneling nightmare LOL! I love looking at home renos. Thanks for posting. It looks like you had fun even though it was a lot of work. And that old kitchen – YIKES!
Thanks, Fern. Yes, a paneling nightmare indeed! This reminds me that I need to add my after pictures…though I always think there are just a few more things I need to do. 🙂
Katy, for that blank wall in the kitchen… I think a little chalkboard paint would be cool. 🙂
I’ve been anti-chalk paint for so long (I think bc I’m a teacher!), but I think you might be right that its the way to go for that wall. I can’t think of ANYTHING else!
You could mix it up and add magnet paint too. But understand why you would be anti chalkboard.
very nice! you two have done a great job. I’m in the process of remodeling a 1960’s ranch myself. It has had it’s ups & downs but it’s coming together.
Thanks so much! Good luck on your home reno! We know all about the ups and downs, but the pride we have in our home now was worth it all!